"If our devotion is to the cause of humanity, we will be quickly defeated and broken-hearted, since we will often be confronted with a great deal of ingratitude from other people. But if we are motivated by our love for God, no amount of ingratitude will be able to hinder us from serving one another."
~Oswald Chambers

Thursday, April 23, 2015

Fabric Roller Shades

I'm not a big fan of covered windows.  Ask Shawn, it drives him crazy.  I feel claustrophobic if there's no light peeping through.  Plus, I love to look outside or let the sun shine in during the long winter months.  In this particular kitchen we get a lot of afternoon sun shining through.  It can get a bit hot in the summer time.  But I don't want dirt and dust collectors.  So when I saw this tutorial for fabric covered shades I was hooked.  I love being able to chose my own fabric color and pattern.  So often when looking for window treatments, I wish I had a sewing machine.
I found a tutorial on Pinterest.  In fact, there are several examples on Pinterest.  I read a few of them to determine exactly what products I would need.

Supplies I used:
Sharp scissors
Fabric
Tape Measure
Spray On Adhesive (any brand)
Anti-Fray (if you're NOT sewing a hem)
Plastic, tarps or newspaper

Measure your window for either an outside or inside mount.  I purchased mine at Home Depot.  They are super inexpensive and they will cut them to whatever size you need.  When purchasing your fabric, add 2 inches to width for your fabric and 4 inches to the length.  Another tip, do not chose a heavy fabric as it will make the shade cumbersome and it may be too bulky and heavy for the mechanism to work properly.

Roll out the shade on a flat surface face up. Then lay your fabric, face up as well,  over the shade.  I highly recommend ironing your fabric first. You'll thank me later. Peel back a few inches of the fabric and spray your adhesive onto 1-2 inches of the shade.  Then quickly lay the fabric back over where you sprayed.  Spread gentle but firmly to smooth out any wrinkles.  Always work from the center out.
I ran a couple strips of blue tape along side so that I didn't ruin Shawn's tarp when spraying the adhesive out toward the edges.
Then roll back the fabric again and spray the next 6 inches of the shade with the adhesive.  Repeat covering fabric and pressing out wrinkles.  Do this until your entire fabric is adhere to the shade.  
I added a piece of braided trip to where the fabric meets the seam at the bottom of the shade.  While I used the hot glue gun to adhere the trim I also added a tassel, which I secured with hot glue and then ran the braided trim right over top.
 I found center and marked the tarp with a Sharpie so I knew where to attach the tassel.
Like with the adhesive spray, you must work quickly with the hot glue gun.  Don't allow the gun point to come in contact with the shade for any extended time.  It will melt from the heat of the gun.
After a few minutes of drying time, I flipped the whole shade over face down.  With a very sharp pair of scissors, trim the material to match the shade edge.  Then use your anti-fray liquid to ensure your fabric won't fray with use.
I don't sew or at least, I don't have a sewing machine, yet. I chose to cut my fabric right to the edge of the shade width as opposed to hemming it and gluing the hem.

Let the shade dry about 30 minutes.  Then roll them back up neatly and tightly before you attach them into the hardware.  This will ensure that the snap release mechanism is ready to fire.

Ta-Da! There you have it.
A rather inexpensive but custom made shade for your window.
 This was a very easy project that only took a couple of hours.
It adds so much character to the room!

Sunday, April 19, 2015

Death and Life

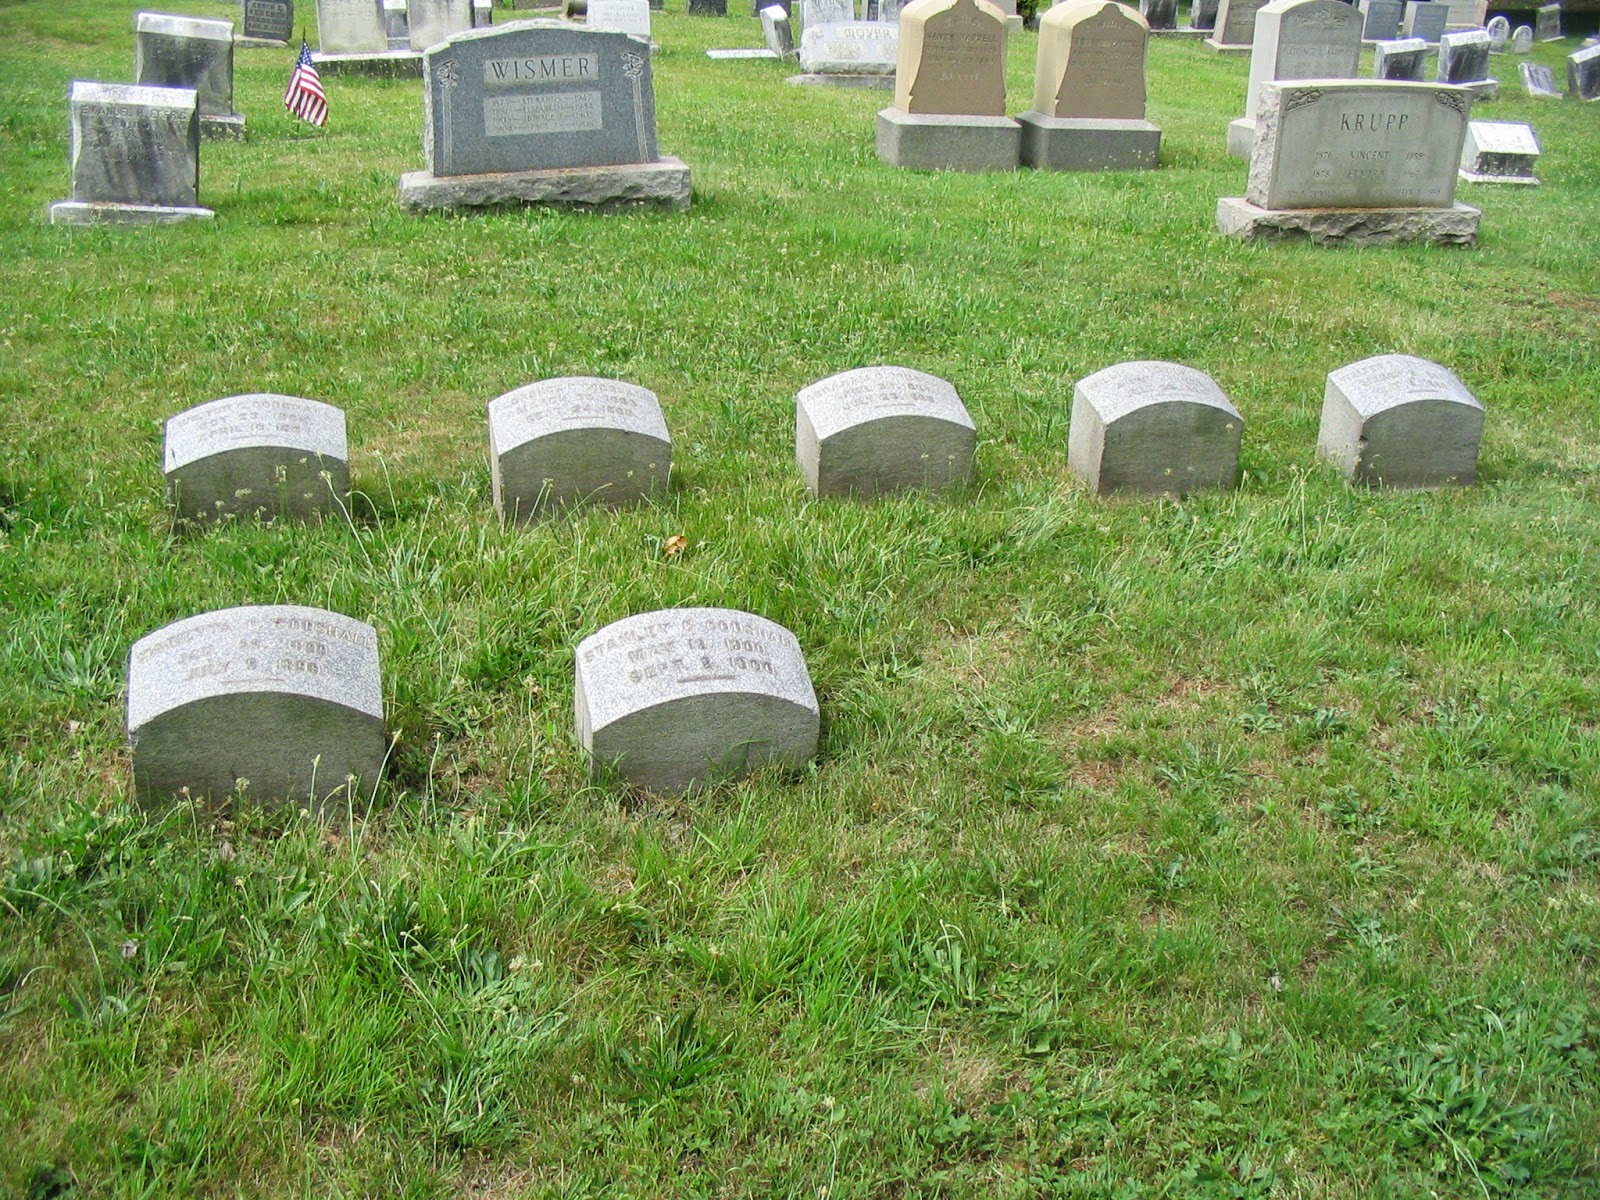
Daisy and I strolled through Edgemont early this morning.  The sunrise was to our backs, but it was breathtakingly beautiful.  We detoured through the cemetery on our way home.  As I read the tombstones, I recalled visiting my great-grandparent's grave site with my mom and the boys years ago.  She told me the story of how they lost so many babies and how her grandmother must have been in a perpetual state of grief.  Her grandfather drank quite a bit as well, I'm sure to numb his pain.
 Climbing the monument.  Titus must have been in a stroller.
Her father's family stone.
Their children's stones. I can't even...

This was taken during my walk this morning.
 I was unable to make out the wording on the upright marker with the flag and wreath.
But this was the one below.  How cool is that?  An Indian grave marker.
 It appears these markers were recently found and uncovered.  I'd love to know the history of them.

 Simply gorgeous view with the early morning sun shining on the cemetery.
 Facing the sun.  Love the shadows and outlines.

Of course, I thought of all the loved ones who've gone before me.  I miss them all, some more so than others as the gaping wound is still raw and bleeding.
I'm so thankful for the hope in Jesus, as I will see them again one day.

But now Christ is risen from the dead, and has become the firstfruits of those who have fallen asleep. For since by man came death, by Man also came the resurrection of the dead. For as in Adam all die, even so in Christ all shall be made alive.  
1 Corinthians 15:20-22

Saturday, April 18, 2015

Countertops - Step 3 I did it!!

After allowing the faux finish to dry for 4 hours per instructions, I sanded the surface down with 600 grit sandpaper and then wiped thoroughly clean (2x) with a damp cloth. Then I applied the top coat of sealant.  Thankfully, Shawn got home right after I had begun.  I was so nervous.  You have to work quickly with polyurethane or it leaves marks.  He was able to reach way back in the corner spot for me.  He gave me a few pointers and even offered to finish it for me if I wanted.  I declined as I like to learn new tricks myself.  I'm quite certain that he would have done a much quicker and professional job than I, but heck - I'd come this far, right?! I might as well see the project to the end.

I waited another 4 hours, sanded and wiped clean again and then applied the final coat as thickly as I could.  Shawn and the boys were quite impressed.  "You actually pulled it off!" Shawn said.  He wasn't quite sure what to expect as he hadn't seen any of the tutorials or pictures before I got started.

It dried overnight.  They say you can use your countertops again after a 24 hour drying period.  Shawn suggested waiting a bit longer if possible.  Will do!

Tips:  work quickly.  Lay it on, level it out and leave it ALONE, no matter how much you want to go back over a spot.  Don't.  Make sure you have good lighting so that you can see if you are overlapping without a line.  

 I echo the other girls who've gone before me with this kit, "Pictures just don't do the end result justice."  But hopefully, you get an idea of the transformation.

 I'm beyond pleased!
I apologize that my posts are long and drawn out.  I posted as I went so that I wouldn't forget anything once it was completely finished.
After they have cured long enough to put items back on the surface, I'll post a before and after picture.

Friday, April 17, 2015

Countertops - Step 2

For some reason, I was quite nervous about this step.  Funny, because it's by far the most individually creative step.  I dove in with minimal practice on the sheet of construction paper provided.  I used Step 2A Pearl Mica first and I decided, after reading a review, to apply it with a plastic bag instead of the sponge.  I'm glad that I did as I really liked the results.  More veiny and liney, if those are even words.  I then used Metallic Silver Acrylic paint from AC Moore with the sponge provided.  I loooved this with the Pearl.  It gave it a bit more depth but continued to lighten up the black base coat.  Gotta love more metallic and glitter. Then I hesitantly, opened up the Black Onyx and applied very gently and carefully using the sponge.  I loved this so much more than I thought I would.  I couldn't figure out why the put black in this kit.  Now I see why.  It gave the pearl and silver dimension that was much needed.  I sprinkled some very fine black glitter into the paint for yet more shimmer.  Then I went back over with a sponge this time, and reapplied the Pearl Mica to break up the Black Onyx.

I should have worn gloves.  I was afraid it would make the bag/sponge too cumbersome and difficult to manage.  The metallic and pearl is really difficult to clean off skin - note to self.

This is the Pearl Mica, my first application.

At this point, I'm getting more comfortable with the technique and feeling almost like a pro.  I think it took a little over two hours.  But remember, I'm slow and meticulous at anything.  Perhaps it would be quicker for you.

I had seen tutorials on veining, however, I didn't care for it and couldn't get the "look" down, so I didn't bother. Maybe it would be more effective on a lighter shade kit. 

 Personally, I don't think it looks like granite, but I certainly looks better than what was on there.  Perhaps more like a glorified Formica finish!

 You must allow 4 hours drying time before applying the top coat sealant.  I will post more once that step is completed.  Overall, I am very pleased with this kit and the product.  Although, now I'm even more anxious to get the floor project started. Just a little more orange left in here to conceal.  Also, the tin tile backsplash should definitely add more texture and character than the white bead board is providing now.